总结:
controller展示定义接口路径和调用service
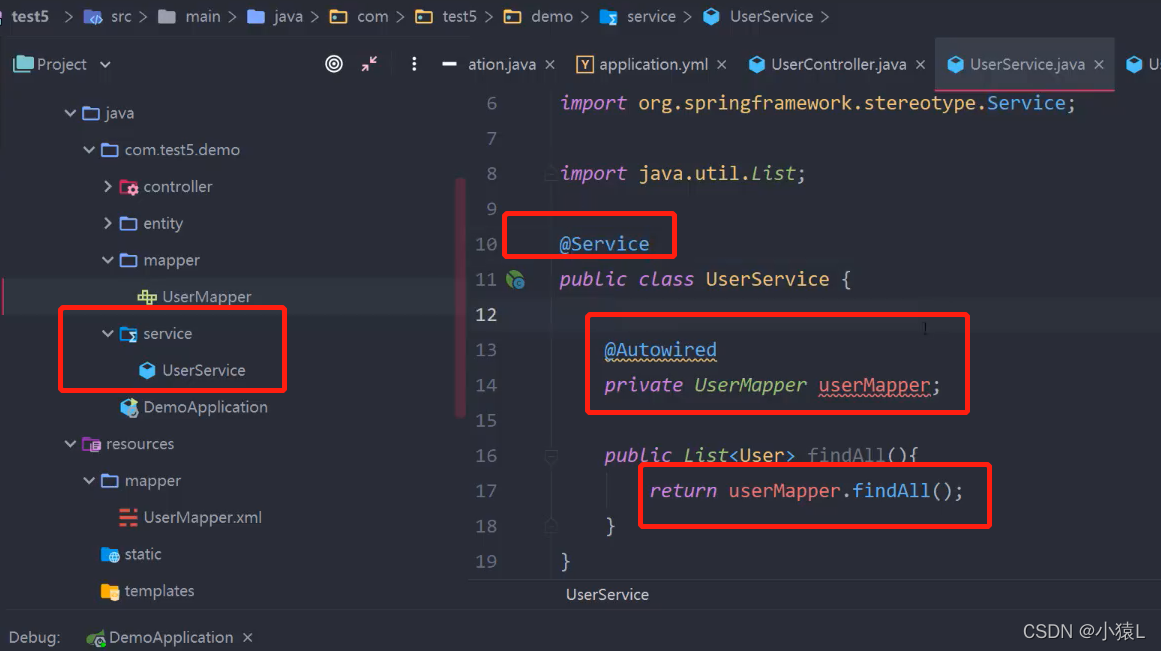
service处理业务逻辑数据库数据
mapper定义操作数据库动作,命名
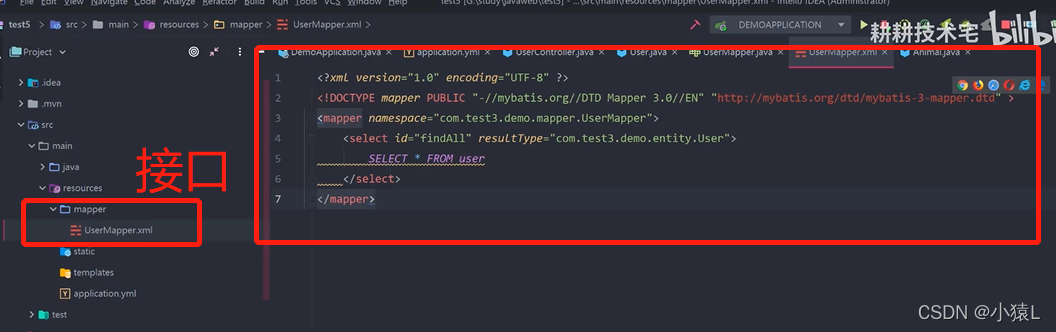
mapper.xml执行mapper里定义的动作的sql语句,与数据库交互
entity定义类,与数据库类型保持一致
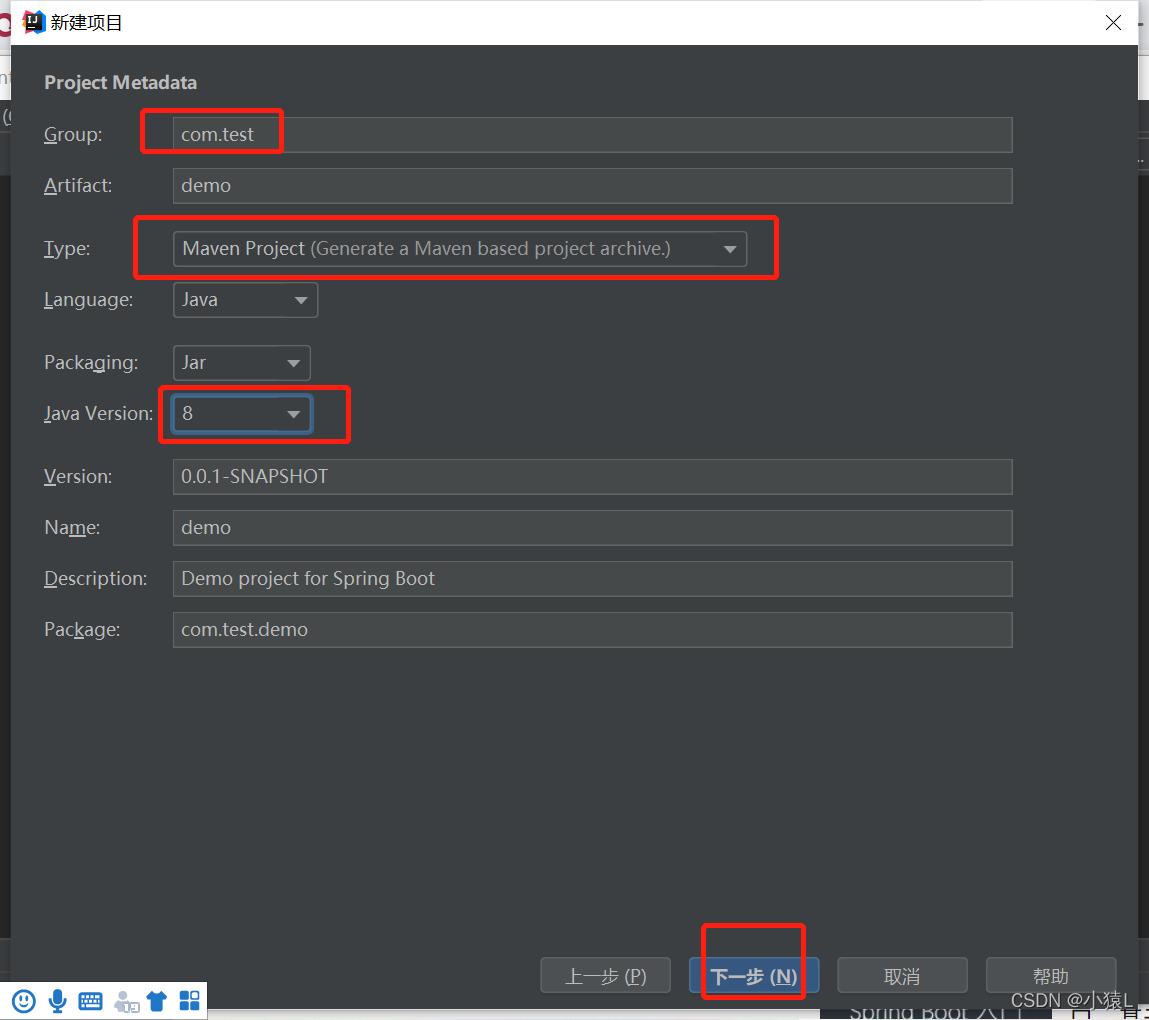
https://www.bilibilcom/video/BV16541147s1?from=search&seid=14149306823192602727&spm_id_from=33330.0第一步newproject

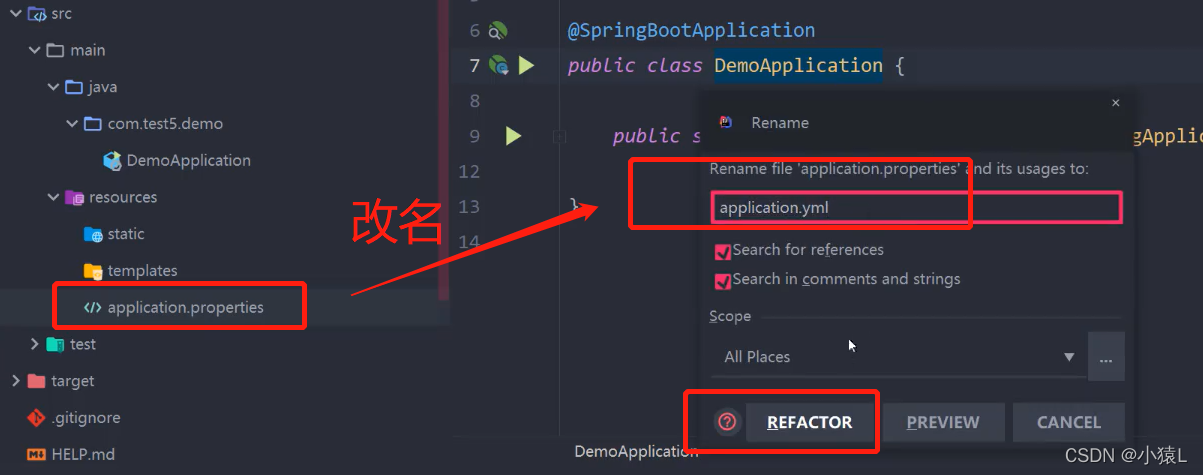
修改名字
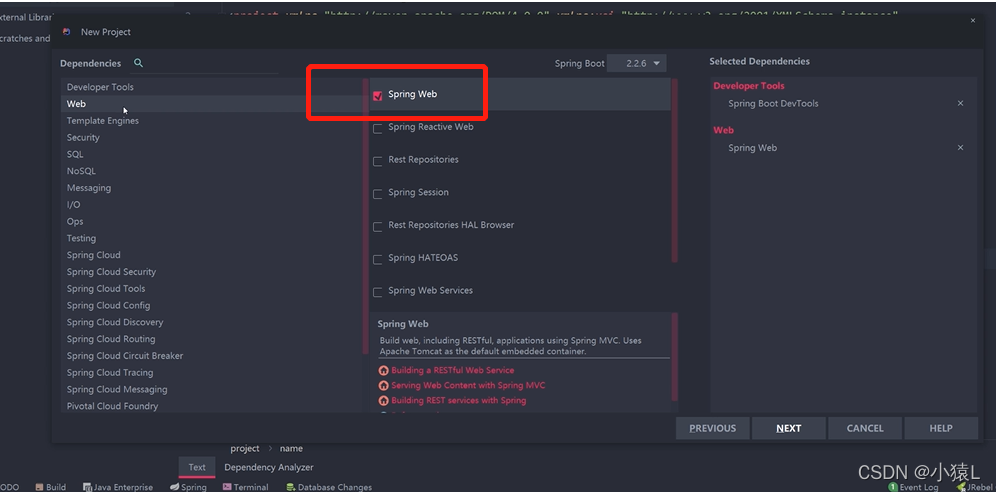
安装相关依赖
首先勾上这个工具,方便以后用
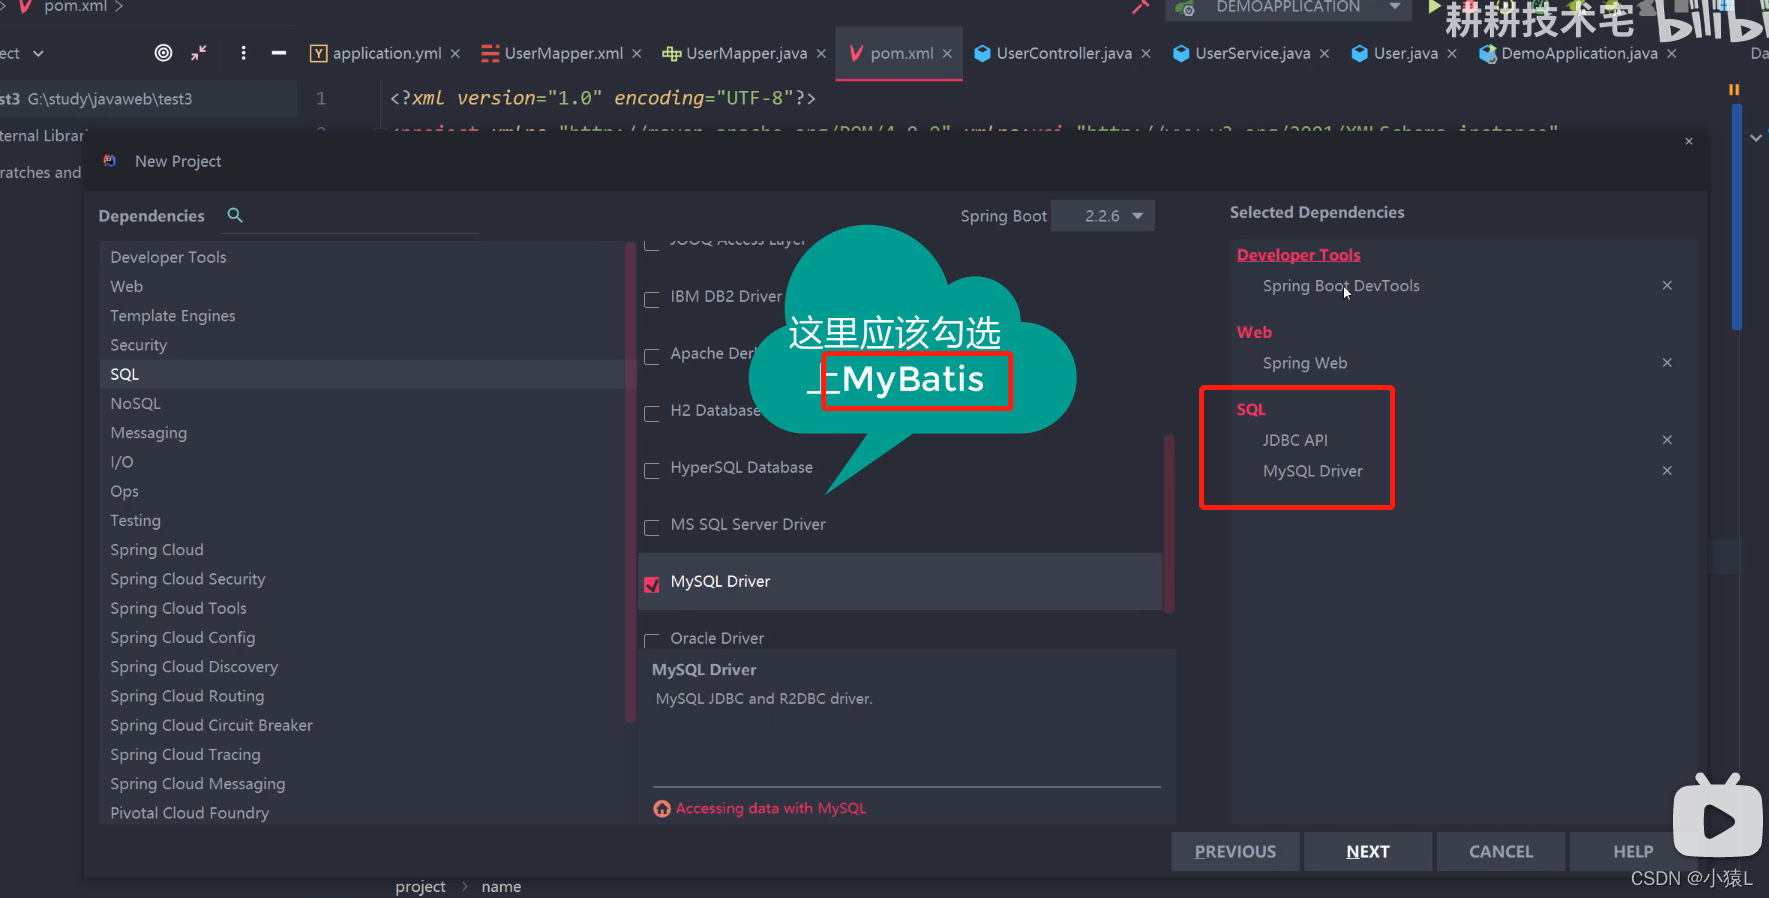
用上数据库,勾上框的那三个
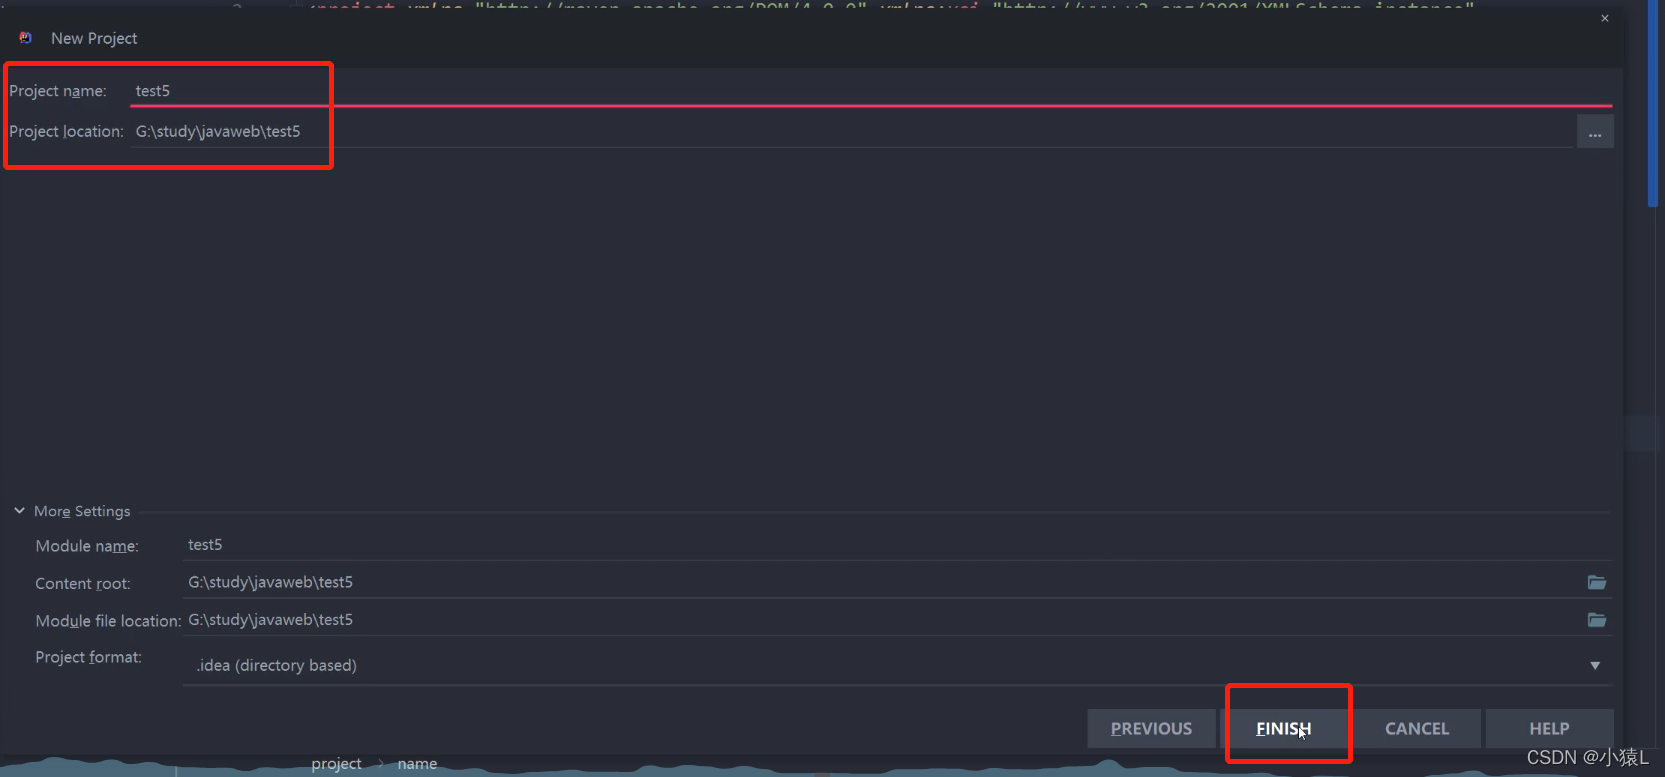
命名
第一次下载会有点慢
进来配置数据库信息
yml配置
下面用户名密码数据库端口按照自己实际情况来
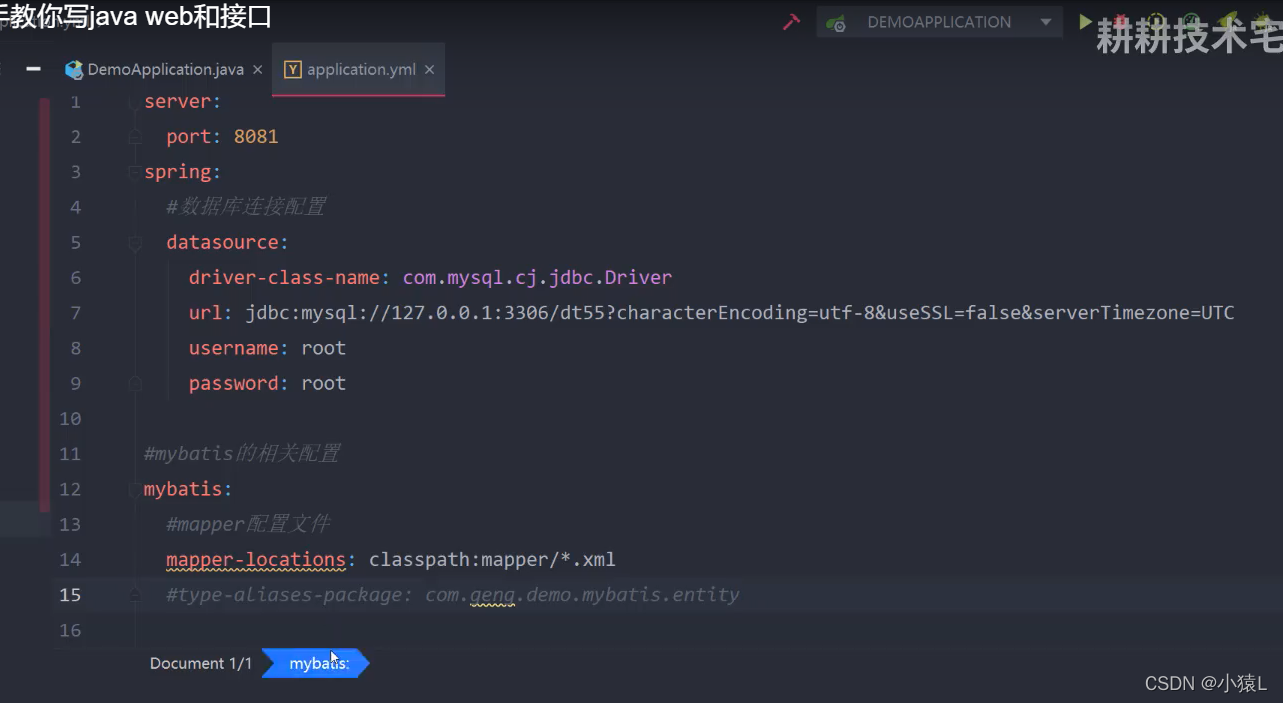
spring:
  datasource:
    url: jdbc:mysql://localhost:3306/test1?characterEncoding=utf-8&serverTimezone=GMT%2B8
    username: root
    password: 123456
    driver-class-name: com.mysql.cj.jdbc.Driver

mybatis:
  mapper-locations: classpath:mapper/*Mapper.xml
  type-aliases-package: com.test.elasticsearchdemo.domain
再次运行,分配端口
访问空白
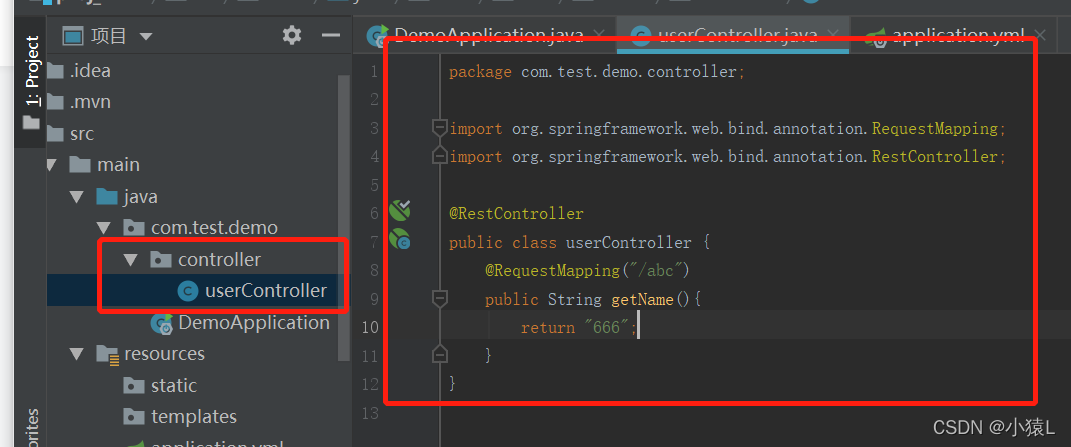
建立controller包,建立类,返回一些数据(现在是静态的)
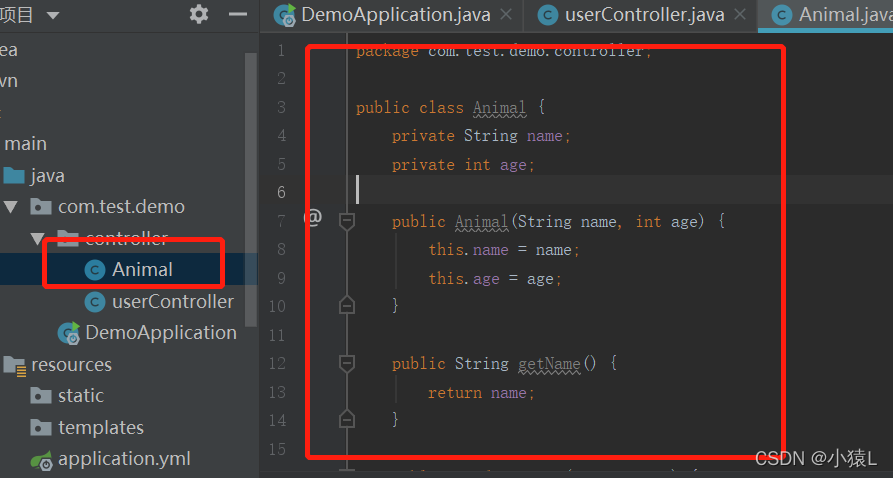
模拟返回json格式,建立Animal类,右键——生成——构造函数/getset
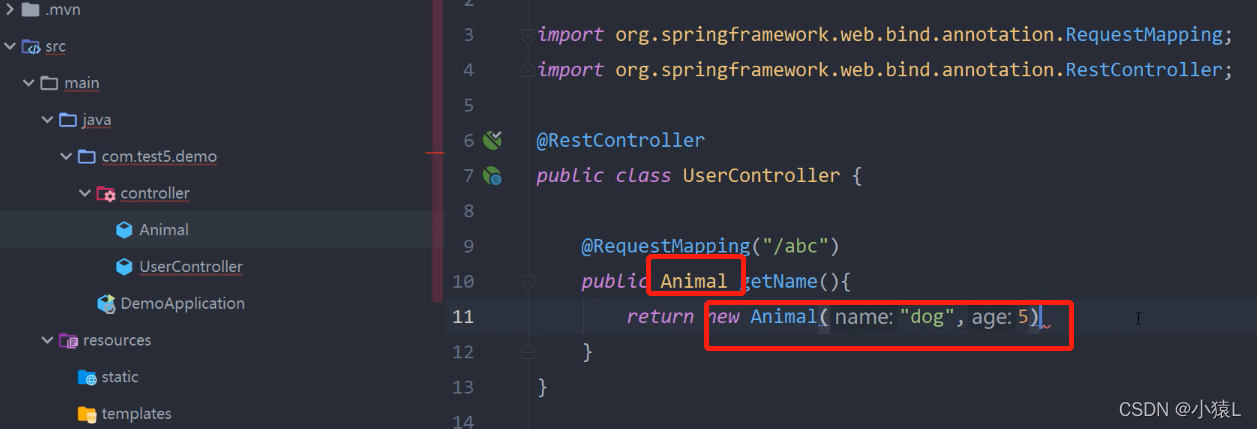
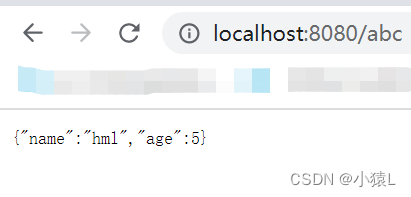
设置返回这个json对象returnnewAnimal('dog',;
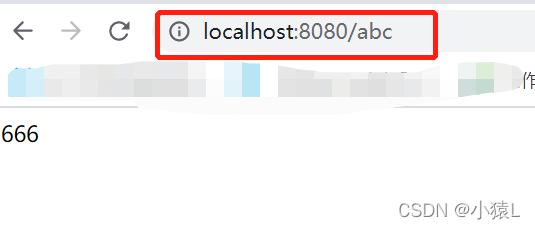
成功返回
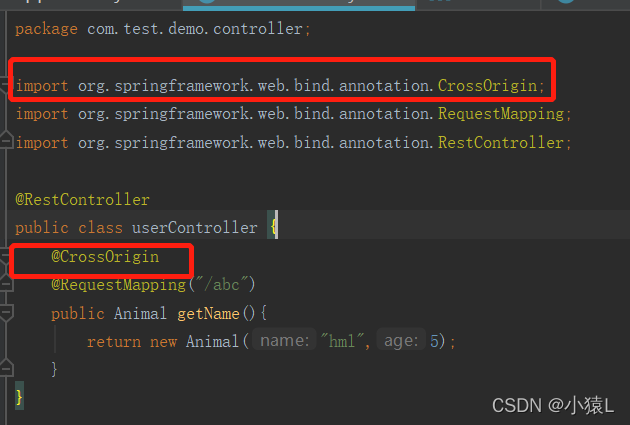
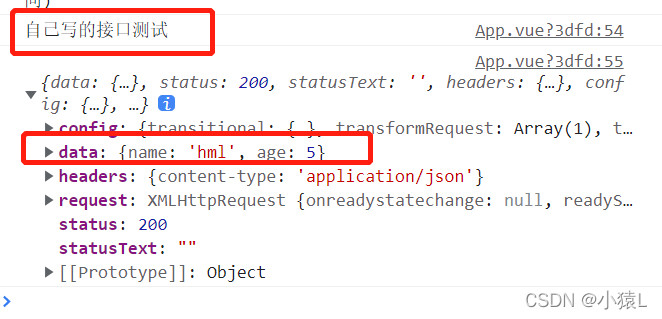
前端测试接口,因为端口的不同还是出现了跨域问题

通过@CrossOrigin解决,因为方便,但是不是很好,还是单独配置一下过滤器比较好
下面当然是需要用到数据库的调用,真正实战都是调用数据库的嘛

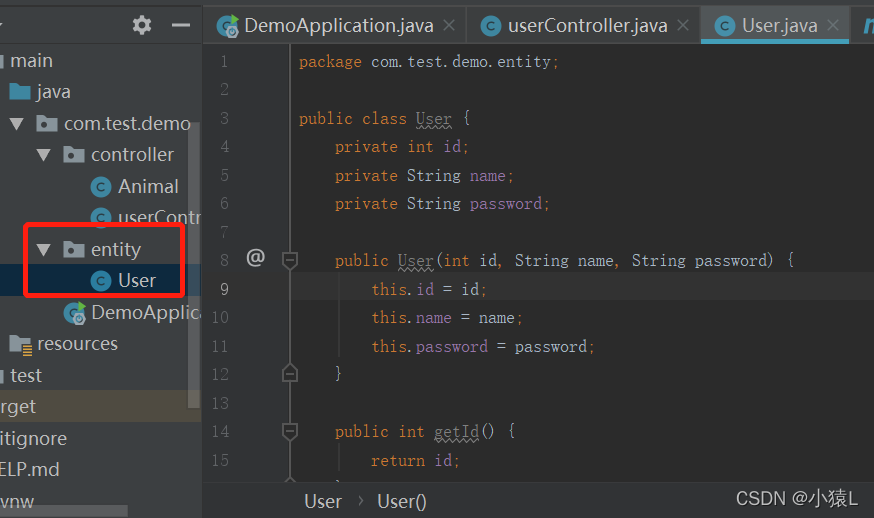
首先建立实体类
package com.test.demo.entity;

public class User {
    private int id;
    private String name;
    private String password;

    public User(int id, String name, String password) {
        this.id = id;
        this.name = name;
        this.password = password;
    }

    public int getId() {
        return id;
    }

    public void setId(int id) {
        this.id = id;
    }

    public String getName() {
        return name;
    }

    public void setName(String name) {
        this.name = name;
    }

    public String getPassword() {
        return password;
    }

    public void setPassword(String password) {
        this.password = password;
    }
}
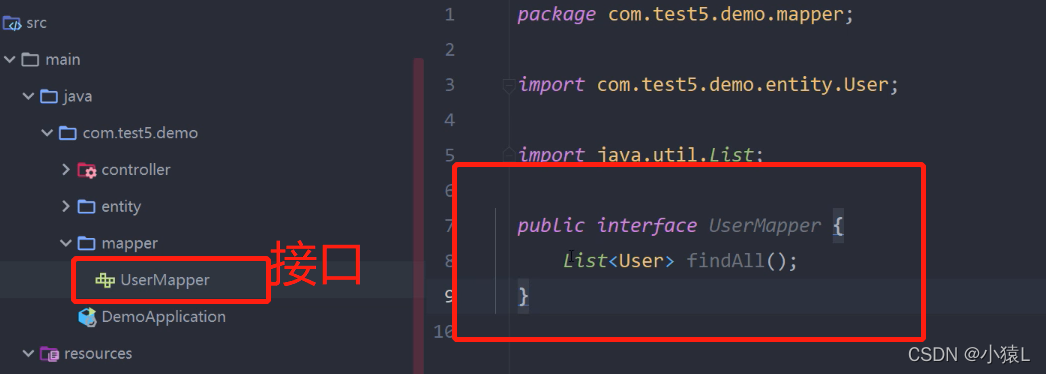
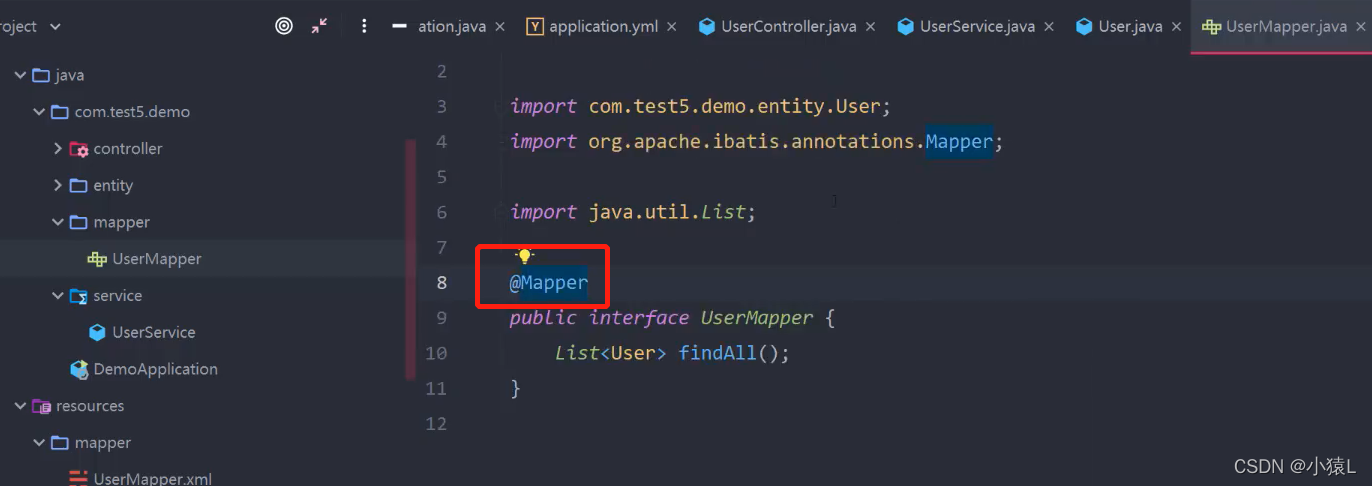
mapper操作数据库动作
package com.test.demo.mapper;

import com.test.demo.entity.User;
import org.apache.ibatis.annotations.Mapper;

import java.util.List;
@Mapper
public interface UserMapper {
     // 定义操作数据库为查找所有用户
    List findAll();
}
定义查找所有的数据
建立mapper.xml
mapper.xml配置详解
在resource文件下
service操作导出数据库数据
package com.test.demo.service;
import com.test.demo.entity.User;
import com.test.demo.mapper.UserMapper;
import org.springframework.beans.factory.annotation.Autowired;
import org.springframework.stereotype.Service;
import java.util.List;

@Service
public class UserService {
    @Autowired
    private UserMapper userMapper;
    public List findAll(){
        return userMapper.findAll();
    }
}
mapper里面加注解@mapper
最后controller里面设置接口
package com.test.demo.controller;

import com.test.demo.entity.User;
import com.test.demo.service.UserService;
import org.springframework.beans.factory.annotation.Autowired;
import org.springframework.web.bind.annotation.CrossOrigin;
import org.springframework.web.bind.annotation.RequestMapping;
import org.springframework.web.bind.annotation.RestController;

import java.util.List;

@RestController
public class userController {
    @Autowired
    private UserService userService;

    @CrossOrigin
    @RequestMapping('/abc')
    public Animal getName(){
        return new Animal('hml',5);
    }
    @CrossOrigin
    @RequestMapping('/abcd')
    public List getUser(){
         return userService.findAll();
    }
}
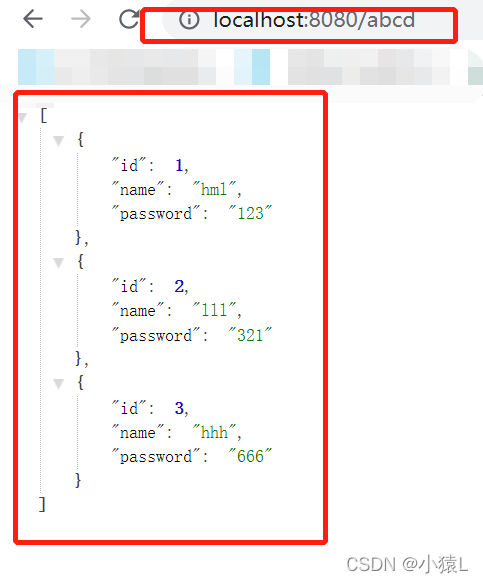
效果:

开启谷歌插件json格式化
效果有:
文章为作者独立观点,不代表 股票程序化软件自动交易接口观点
相关文章


股民评论